GIF Video ......>>>

Successful .....>>>

This
image has been resized. Click this bar to view the full image. The original image is sized 824x566.

 mportant:
 Make sure your tablet is
charged to at least 50% charge, this is a precautionary measure because
if the battery runs out during the upgrade or the upgrade is
interrupted in some way it’s not going to be pretty.
Important: This process will wipe all
user data and apps installed on the device, it is recommended to
backup all your important apps and info before proceeding with the
update.
Important: You need to
download
the correct version for your device, either version 1 or version 2.
To find out what version your device is follow these steps:
For NOVO 10 Captain v2 devices: update on 9/24/2013
Ainol Captain Android 4.2.2 – 2013-9-24
For NOVO 10 Captain v2 devices: update on 8/20/2013
Ainol Novo10 Captain 2013.08.20 V2.rar – 437.75 MB
For NOVO 10 Captain v1 devices: update on 8/12/2013 (Captain sold by uPlay Tablet is this version)
Ainol_Captain_20130812.rar – 428.31 MB
For Hero II v1 devices:
Hero II Quad Core – Android 4.2.2 (v1) – Upgrade firmware
For Hero II v2 devices:
Hero II Quad Core – Android 4.2.2 (v2) – Upgrade firmware
Upgrade Utility – All Devices:
Pad Product Tool – Upgrade Utility
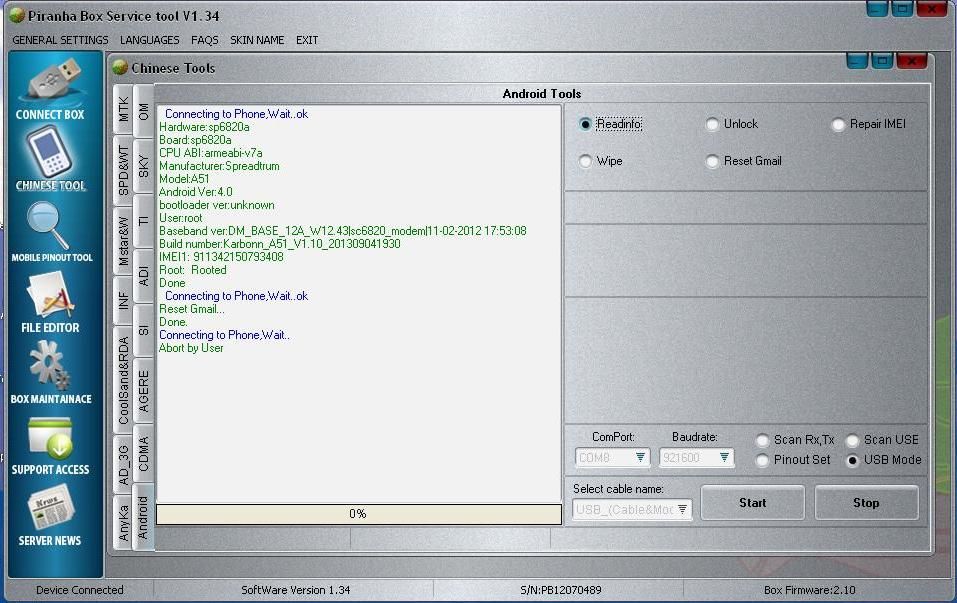
Firmware upgrade instructions
Download firmware and upgrade tool
Install "Tablet Product Tool(Developer Edition) 1.02" on your PC
Shut down device
Press and hold Volume + and connect the USB
cable to PC
Install
USB drivers
Launch "Tablet Product Tool(Developer Edition) 1.02" on your PC
Select all required files and press Run to start upgrade process
Once finished unplug USB cable and long press power button for 8 seconds to boot device
First boot after upgrade may take up to 2 min
mportant: Make sure your tablet is
charged to at least 50% charge, this is a precautionary measure because
if the battery runs out during the upgrade or the upgrade is
interrupted in some way it’s not going to be pretty.
Important: This process will wipe all
user data and apps installed on the device, it is recommended to
backup all your important apps and info before proceeding with the
update.
Important: You need to download the
correct version for your device, either version 1 or version 2. To
find out what version your device is follow these steps:
For NOVO 10 Captain v2 devices: update on 9/24/2013
Ainol Captain Android 4.2.2 – 2013-9-24
For NOVO 10 Captain v2 devices: update on 8/20/2013
Ainol Novo10 Captain 2013.08.20 V2.rar – 437.75 MB
For NOVO 10 Captain v1 devices: update on 8/12/2013 (Captain sold by uPlay Tablet is this version)
Ainol_Captain_20130812.rar – 428.31 MB
For Hero II v1 devices:
Hero II Quad Core – Android 4.2.2 (v1) – Upgrade firmware
For Hero II v2 devices:
Hero II Quad Core – Android 4.2.2 (v2) – Upgrade firmware
Upgrade Utility – All Devices:
Pad Product Tool – Upgrade Utility
Firmware upgrade instructions
Download firmware and upgrade tool
Install "Tablet Product Tool(Developer Edition) 1.02" on your PC
Shut down device
Press and hold Volume + and connect the USB cable to PC
Install USB drivers
Launch "Tablet Product Tool(Developer Edition) 1.02" on your PC
Select all required files and press Run to start upgrade process
Once finished unplug USB cable and long press power button for 8 seconds to boot device
First boot after upgrade may take up to 2 min